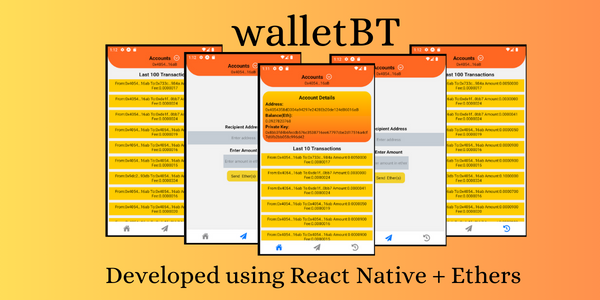
In this blog post, you will learn how to create a simple React Native app that shows the top cryptocurrencies list with name, price, logo, etc… If you want to run the code and see what it looks like then you can clone the top-100-crypto-price-list Github repo and run it. If you want to know how to create the crypto price list app then continue reading it.
Overall crypto price list app structure
The project structure for the crypto price list app is as follows.
- components/
- CryptoPriceList.js
- SingleItem.js
- store/
- cryptoSlice.js
- store.js
- App.js
I have shown only the important folders and files that are used. All other default files and folders are not shown. This app is created using the Expo, if you are not familiar with it then please refer to my blog post on How to Create React Native App with Expo.
Crypto price list app dependencies
Some of the dependencies that are used in creating the cryptocurrencies price list are as follows
- react-redux – it provides the useSelector() and useDispatch() hooks to access the state and dispatch actions
- @reduxjs/toolkit – it provides an easy way to implement redux with the help of createSlice() and configureStore() functions
- axios – it provides HTTP requests like get, put, post, and delete
The command to install each of the dependencies is as follows
npm install react-redux @reduxjs/toolkit axiosConfigure your global state store with the redux toolkit
First, let’s make a global store for storing all the cryptocurrency’s prices and information associated with it. For this, we will make use of the redux toolkit. For that create a folder called the store at the root level of your project/app. Inside it create a cryptoSlice.js file. The content of the cryptoSlice.js file should look like the one given below.
Source code for cryptoSlice.js file
import { createSlice, createAsyncThunk } from "@reduxjs/toolkit";
import axios from "axios";

export const getCryptocurrency = createAsyncThunk(
  "crypto/getCryptocurrency",
  async () => {
    const response = await axios.get(
      "https://api.coingecko.com/api/v3/coins/markets?vs_currency=usd"
    );

    return response.data;
  }
);

const cryptoSlice = createSlice({
  name: "cryptocurrency",
  initialState: {
    loading: null,
    cryptocurrency: null,
    error: null,
  },

  extraReducers: (builder) => {
    builder
      .addCase(getCryptocurrency.fulfilled, (state, action) => {
        state.cryptocurrency = action.payload;
        state.loading = false;
        state.error = null;
      })
      .addCase(getCryptocurrency.pending, (state) => {
        state.loading = true;
      })
      .addCase(getCryptocurrency.rejected, (state) => {
        state.loading = false;
        state.error = "Request Failed";
      });
  },
});

export default cryptoSlice.reducer;
Let’s look inside the code. There is a crypoSlice variable that defines the state of the cryptocurrencies that we will be storing. The first property it takes is the name. Since we are creating the store for cryptocurrency, you can assign the string value of “cryptocurrency” or anything that you want to call it. The second property that is used is called initialState. Basically, you can define all the variables/states that you want for your cryptocurrency. There is loading, error, and cryptocurrency state all assigned with the null value. The loading state is used to keep track of whether the cryptocurrency data are loaded or not, the error state is used to store the error message, and the cryptocurrency is used to store the list of cryptocurrency data.
Fetching the cryptocurrency data for the crypto price list app
In order to fetch the crypto price list data, we will make use of free and open API which can be accessed from the https://api.coingecko.com/api/v3/coins/markets?vs_currency=usd. Whether the data provided by this API is authentic is not verified. The objective is to learn how you can create the app. If you want to have authentic data then you may consider using one of the paid APIs. Since the process of fetching data is an asynchronous call, we will make use of createAsyncThunk() provided by the redux toolkit to handle such cases.
The createAsyncThunk() function allows you to make the asynchronous call. It takes two parameters, the first one is action type and the second one is async function. The async function further can take the payload and thunkAPI. It is optional to use based on your requirements. In our case, we are directly accessing the endpoints, so we will not make use of anyone. More details about it can be found on its official website called redux toolkit.
Just remember to export the getCryptocurrency() method, because it will be required to initiate the call later on the code base. Now you can assign your getCryptocurrency() method with the extraReducers property provided by the createSlice() method. It takes a builder object which has the addCase() method to handle the different types of actions. When you call the getCryptocurrency() asynchronous method, it gives you access to three action types called fulfilled, pending, and rejected. The AddCase() method takes two parameters called the action type and callback function.
- getCryptocurrency.fulfilled – if the async call is successful
- If the request is fulfilled we will assign the cryptocurrency data to the cryptocurrency state, assign the loading state to false indicating the request is completed, and assign the value null to error indicating no error is there. It will be all defined inside the callback function.
- getCryptocurrency.pending – if the method is still in the process of fetching data
- If the request is pending then we will assign the loading state with a value of true indicating that the request is still in process. It will be defined inside the callback function.
- getCryptocurrency.rejected – if there is some error and your request to fetch the data is rejected
- If the request is rejected then we will assign the error message, it can be the default or the custom message. If you want to have a default error then you can access it using state. error. It will be defined inside the callback function.
The last thing to do is to export the crypoSlice.reducer so that we can register it in the redux store.
Register your cryptoSlice in store
The next thing to do is to register your cryptoSlice in the store. For this create a file called store.js inside the store folder that you created before. The content of the store.js file should look like the one given below.
Source code for store.js file
import { configureStore } from "@reduxjs/toolkit";

import cryptoReducer from "./cryptoSlice";

export const store = configureStore({
  reducer: {
    crypto: cryptoReducer,
  },
});
Inside the store.js file you can register the slices that you have created using the createSlice() method. In our case we have cryptoSlice, so import it and then register it using the configureStore() function as shown above. It has a property called reducer through which you can assign it as the key-value pair. Later we will access the cryptocurrency state using the key crypto that we have assigned right now. If you have some other state as well you can register it inside the reducer property.
How to provide access to the redux store for React Native
Now for our crypto price list app, you can make the redux store available from the App.js file. The main thing to consider where to include the redux store depends on which screens or components need access to the redux store. If store access is required all over the app/screens/components then the App.js file is the right place. Because the rest of the code will be the child of the App.js file.
Source code of App.js file
import { StatusBar } from "expo-status-bar";
import { StyleSheet, SafeAreaView, StatusBar as SB } from "react-native";
import { store } from "./store/store";
import { Provider } from "react-redux";
import CryptoPriceList from "./components/CryptoPriceList";
export default function App() {
  return (
    <SafeAreaView style={styles.container}>
      <StatusBar style="light" />
      <Provider store={store}>
        <CryptoPriceList />
      </Provider>
    </SafeAreaView>
  );
}

const styles = StyleSheet.create({
  container: {
    flex: 1,
    backgroundColor: "#0c5cad",
    paddingTop: SB.currentHeight, // adjust the safeareaview for android
  },
});
The App.js file is simple. It has just a CryptoPriceList component. Since every UI will be inside it, we will wrap the CryptoPriceList component with the Provider component provided by the react-redux. The Provider component has a property called store through which you can pass your redux store. In order to pass the store you need to import it as well. Now you can access the store from any components/screens that are inside the Provider component.
Source code for CryptoPriceList component
Now create a folder called components and inside it create a file called CryptoPriceList.js. The content inside it should look like the one given below.
import { useEffect } from "react";
import {
  FlatList,
  Text,
  StyleSheet,
  View,
  ActivityIndicator,
  Button,
} from "react-native";
import { useSelector, useDispatch } from "react-redux";
import { getCryptocurrency } from "../store/cryptoSlice";
import SingleItem from "./SingleItem";

function CryptoPriceList() {
  const dispatch = useDispatch();
  const { cryptocurrency, loading, error } = useSelector(
    (state) => state.crypto
  );

  useEffect(() => {
    dispatch(getCryptocurrency());
  }, []);

  function handleReload() {
    dispatch(getCryptocurrency());
  }
  return (
    <>
      <View style={styles.titleContainer}>
        <Text style={styles.title}>Top 100 Cryptocurrencies Details</Text>
      </View>
      {loading === true ? (
        <View style={styles.loading}>
          <ActivityIndicator size="large" color="white" />
        </View>
      ) : error ? (
        <View style={styles.errorContainer}>
          <Text style={styles.error}>{error}</Text>
          <Button title="Reload" onPress={handleReload} />
        </View>
      ) : (
        <FlatList
          data={cryptocurrency}
          renderItem={({ item }) => <SingleItem item={item} />}
          keyExtractor={(item) => item.id}
          contentContainerStyle={{ backgroundColor: "#ffffff", paddingTop: 8 }}
        />
      )}
    </>
  );
}
export default CryptoPriceList;

const styles = StyleSheet.create({
  titleContainer: {
    width: "100%",
    paddingVertical: 10,
  },
  title: {
    fontSize: 18,
    fontWeight: "bold",
    color: "white",
    paddingBottom: 5,
    textAlign: "center",
  },
  loading: {
    flex: 1,
    justifyContent: "center",
    alignItems: "center",
  },
  errorContainer: {
    flex: 1,
    justifyContent: "center",
    alignItems: "center",
    backgroundColor: "white",
  },
  error: {
    paddingBottom: 10,
    textAlign: "center",
    fontSize: 18,
    fontWeight: "bold",
  },
});
This is a lot of code but I will explain the important one only. The first thing is we are using the cryptocurrency data in this component. Therefore we will use the useSelector() hooks provided by the react-redux, you can see the syntax above for it. With it, we are accessing all the three states variable that is inside the cryptoSlice. Now in order to fetch the cryptocurrency data we will make the call to the getCryptocurrency() method. We want to fetch the data every time when the CryptoPriceList component gets mounted. Therefore we will make use of useEffect() hooks with empty dependencies array. Now in order to call the getCryptocurrency() method you need useDispatch() hook to trigger such action.
We will make use of the FlatList core component to render the individual cryptocurrency details. If the loading state is pending(value would be true) we will display the spinning circle provided by the ActivityIndicator API. In case the loading state value is false then it can be either the request is rejected or fulfilled. If the request is rejected then we will provide the UI to load the data again else the request is fulfilled and we can render the UI. For this, we have a SingleItem component that styles the UI of single crypto data. When the request is rejected we have the handleReload() method to trigger such an event to re-fetch the crypto data.
Source code for SingleItem Component
Now create a SingleItem.js file inside the components folder. The content of it should look like the one given below. If you want to change the UI then feel free to do so.
import { View, Text, StyleSheet, Image } from "react-native";
import { memo } from "react";

function SingleItem({ item }) {
  return (
    <View style={styles.rootContainer}>
      <View style={styles.imageContainer}>
        <Image
          style={styles.image}
          source={{
            uri: item.image.split("?")[0] ? item.image : <Text>No Image</Text>,
          }}
        />
        <Text style={styles.symbol}>{item.symbol.toUpperCase()}</Text>
      </View>
      <View style={styles.description}>
        <Text style={styles.text}>Name: {item.name}</Text>
        <Text style={styles.text}>Price: ${item.current_price.toFixed(4)}</Text>
        <Text style={styles.text}>
          Volume: {parseInt(item.total_volume).toLocaleString()}
        </Text>
        <Text style={styles.text}>
          PriceChange: ${item.price_change_24h.toFixed(5)}
        </Text>
        <Text style={styles.text}>
          Last Updated: {item.last_updated.split("T")[0]}
        </Text>
      </View>
    </View>
  );
}

export default memo(SingleItem);

const styles = StyleSheet.create({
  rootContainer: {
    flexDirection: "row",
    justifyContent: "space-evenly",
    alignItems: "center",
    backgroundColor: "#c5cfd8",
    marginBottom: 10,
    marginHorizontal: 10,
    height: 150,
    borderRadius: 20,
  },
  imageContainer: {
    height: 70,
    width: 70,
    justifyContent: "center",
    alignItems: "center",
  },
  image: {
    height: "100%",
    width: "100%",
  },
  description: {
    paddingHorizontal: 10,
    paddingVertical: 5,
  },
  symbol: {
    fontSize: 16,
    fontWeight: "bold",
    textAlign: "center",
    paddingTop: 5,
  },
  text: {
    paddingBottom: 5,
    fontSize: 16,
  },
});
Conclusion
You just learned how to use the redux toolkit to manage the state in your React Native application. You also learned how you can handle asynchronous requests. Further, you just create a crypto price list app.

I am an enthusiastic tech guy. Ever ready to learn new technology. I love building software solutions that can help mankind to solve problems.
You can support us by:
- Becoming a patron at https://www.patreon.com/drukinfotech
- Buy me coffee at https://www.buymeacoffee.com/drukinfotech